Interactive Lessons

In the previous blog post, I covered the Lichess Study feature. In this post I want to focus on a relatively new Study feature, namely interactive lessons.
When you create a new chapter in a study, you have four modes to choose from.
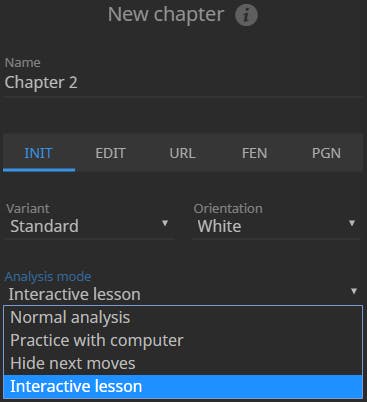
- Normal analysis: The default mode works as a normal analysis board. It can be used for many different things, but is primarily used for game analysis.
- Practice with computer: This mode removes the move list and lets you play the starting position against the engine. It can be used for puzzles or endgame training.
- Hide next moves: This mode is similar to normal analysis, but moves after the current position are hidden from viewers of the study. This is mostly useful for coaches who want to analyze and play "guess the move" with a student.
- Interactive lesson: This interactive mode allows you to guide the study viewer (player) through a game, variation or puzzle by giving them instructions, hints, and feedback when they play the right or wrong moves.
Interactive lessons are well-suited for learning chess in an easy and fun way.
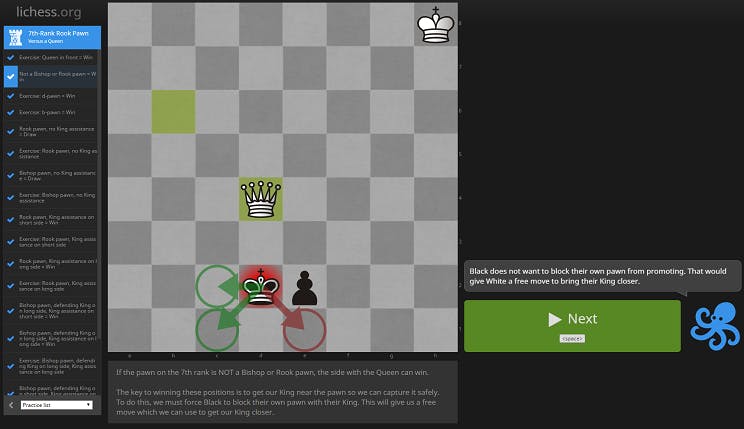
Learning how to win with a Queen against a 7th-rank pawn on the e-file
Here are some example studies that use interactive lesson chapters:
- Checkmating with a Knight and Bishop by arex - recently integrated into Practice
- Queen vs 7th-Rank Pawn by arex - recently integrated into Practice
- 7th-Rank Rook Pawn with a Passive Rook by arex - recently integrated into Practice
- 5 checkmate puzzles by NM ZugAddict
- 64 beautiful study positions by FM thijscom
- 20 puzzles with hints by Franesco_Super
- 16 puzzles with hints by Francesco_Super
- 54 chapters of tactical themes by Ricool8888
- A lesson about traps in the Ruy Lopez by bwalmer
Creating an Interactive Lesson
After creating an interactive lesson chapter in a study, enter the mainline that should be played by the lesson-taker/student/player. (If you imported a game/PGN, this step is obviously already taken care of.) The next step is to add instructive text, annotations, hints, etc.
In this example, the student will play as White. If you want the student to play as Black, just change the "orientation" property of the study chapter in the chapter settings.
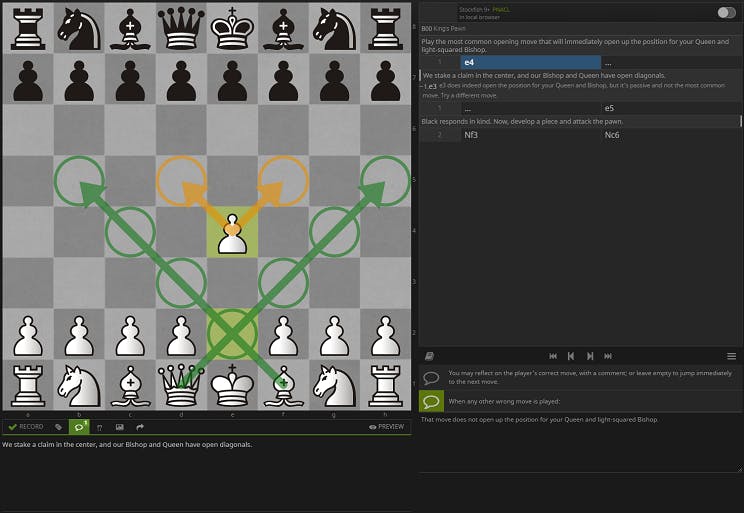
When the next move is a player (White) move, we can add a comment that will be shown before the player is meant to play the next move. The comment can describe the current situation and should prompt the player to find the right move. If a comment is not added, the default text "What would you play in this position?" will be shown to the player. It is also possible to add a hidden hint which will only be shown if the player clicks the "Get a hint" button. If a hint is not added, the "Get a hint" button will not be shown to the student.
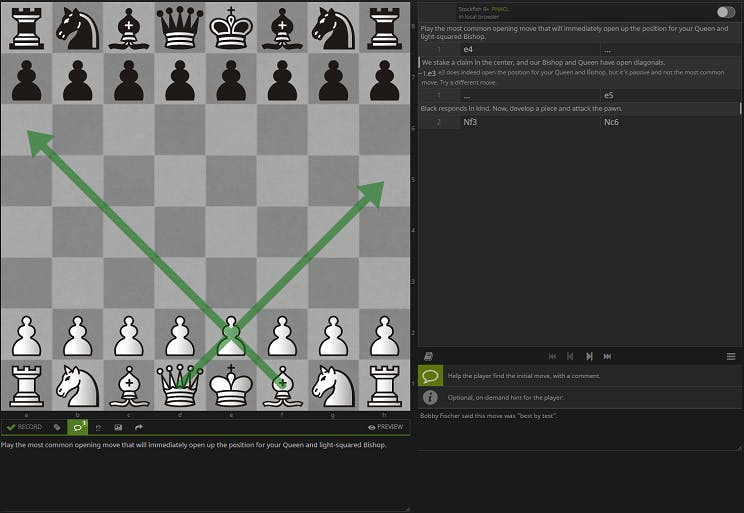
Note the comment on the move (bottom center), the hint (bottom right), and the arrows on the board.
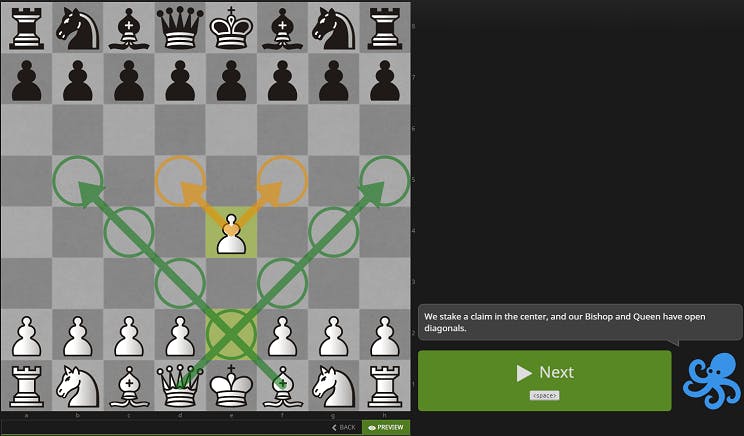
This is how it looks for the player before they make their first move:

We can even add sub-variations with custom "error messages" per move, if we want to give specific feedback for particular wrong moves.
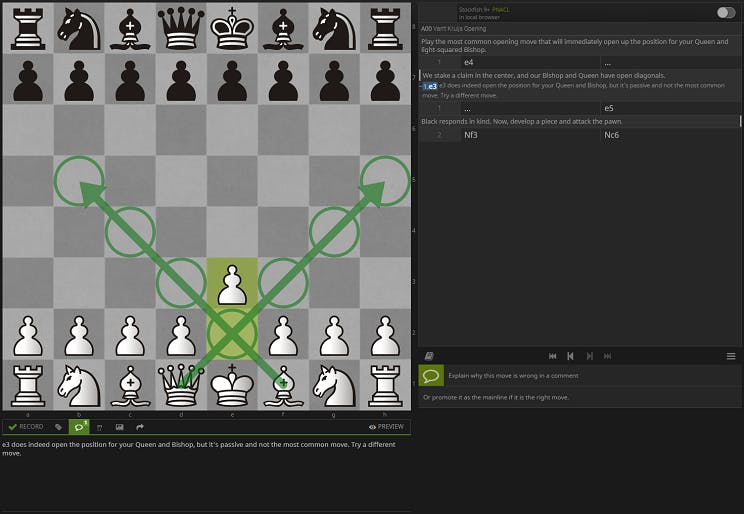
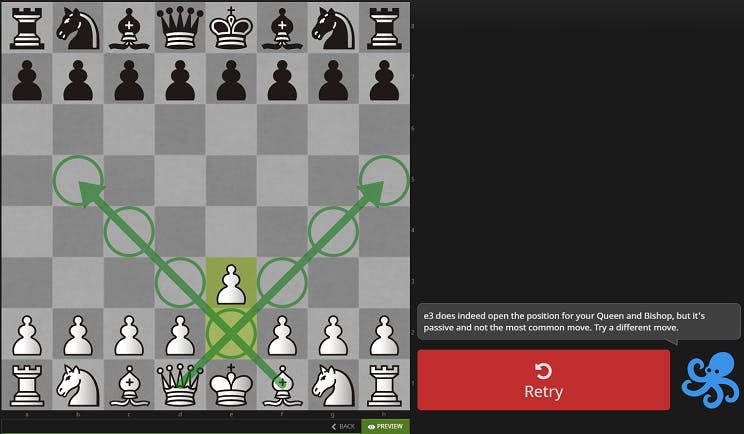
A sub-variation (1. e3) has been added to the study. The comment (bottom center) on this move will be used as the "error message" if e3 is played by the player.
This is how the specific "error message" looks for the player, assuming they play the incorrect 1. e3 on the first move:
When the next move is an automatic (Black) move, we can add a comment that reflects on the player's previous move, or on the response that will be played automatically (by Black). This is often a good opportunity to mention other relevant responses (by Black) and their evaluation. If a comment is not added, no comment will be shown to the player. We can also add a general "error message" that will be shown to the player if they don't play the mainline move.
Note the comment on the move (bottom center) and the general "error message" (bottom right).
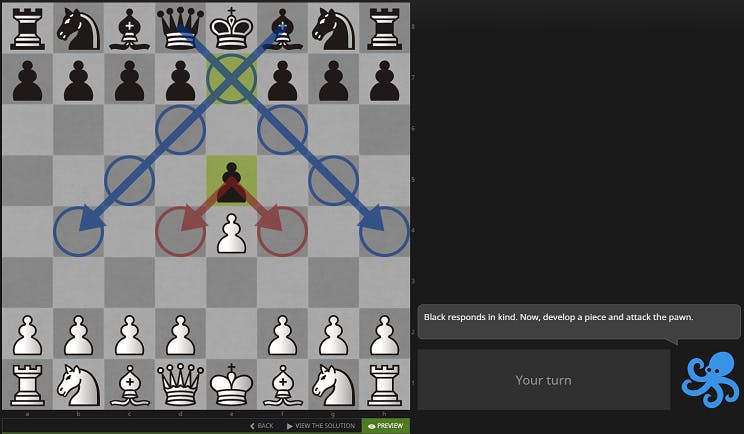
This is how it looks when the player has played their first move correctly:
When the player clicks Next (or presses Space on their keyboard), the automated response by Black is played, and White gets to make another move:
To play or clone the study used in this example, go here.
If you know of any good lessons that have not been mentioned in this blog post, feel free to mention them in the comments.